Making a comic from A to Z with free software
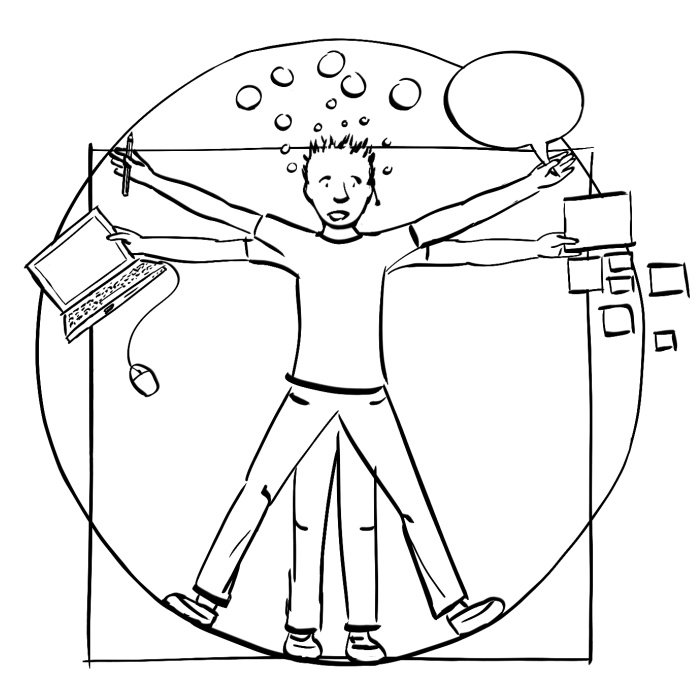
There are many ways to create comics, but as many authors, I found my own way with my tools of choice, free software. I can’t really work outside my office in my home, so I choose to work in a full digital process.
It have many steps, but I need them as a careful craftsman, and I learned that spending time on the conception phase (scenario, cutting, model sheet, storyboard) make me win time on the production phase (final drawing and layout).
I will describe my method here with the example of Mokatori episode 0 I released a little more than two weeks ago.
Hopefully you will be able to adapt my method to your own project 😉
Scenario
Some start by scribbling, but for me a comic start with a story idea, and with a text. And by reading books, because you can’t talk about climate change without some documentation!
Here is the scenario for Episode 0, which is also a letter:
#### Our possible futures[Legal Information]
[Dedication] You can’t predict the future, but you can achieve it
[Thanks]### Opening – an illustration
The Earth, and inside it two fetuses : one of a baby dinosaur, one of a baby human.[Subtitle] “Last time there was as much carbon dioxide (CO2) in the atmosphere as there is today… was 3 million years ago*. Dinosaurs were not even born.” [source : Gilles Ramstein, Voyage à travers les climats de la terre – Travel through the earth climates, p.282]
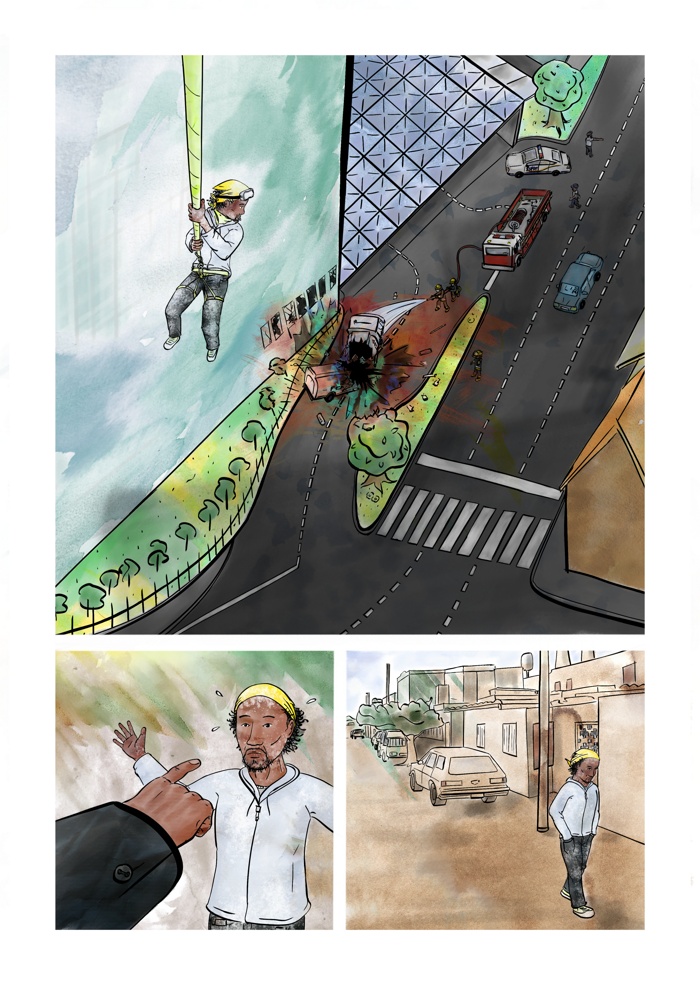
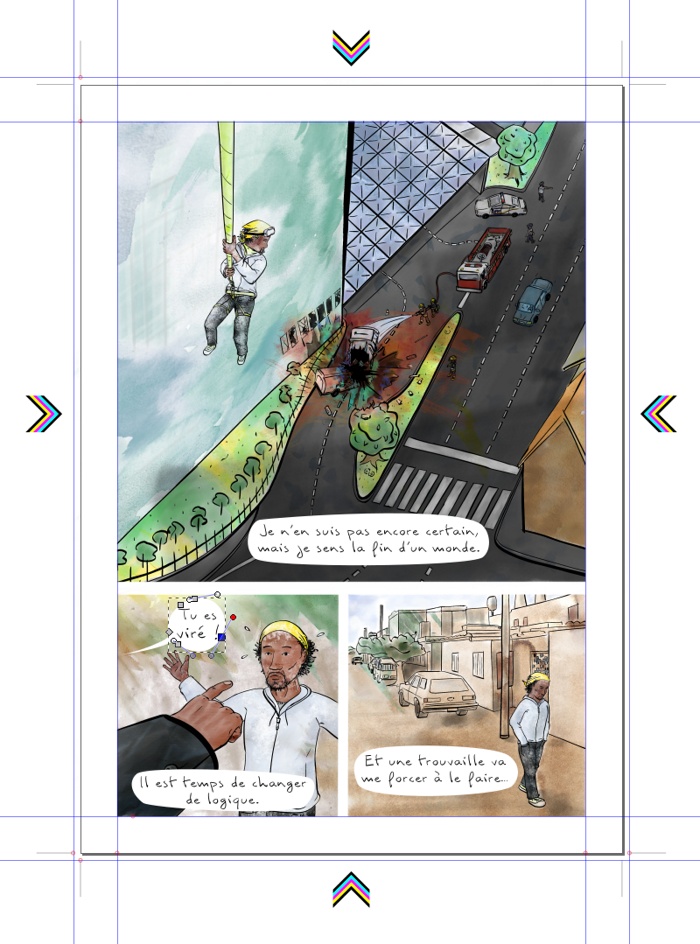
### Ep. 0 – “The End” [Introduction, a mexican worker on a building site]
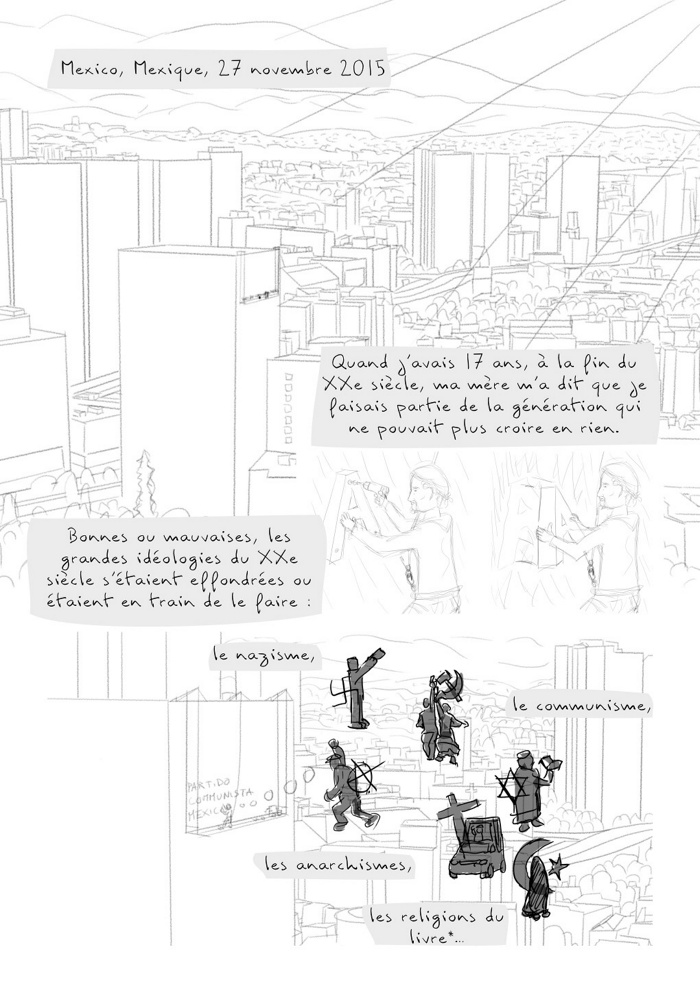
*Mexico City, Mexico, November 27, 2015*
When I was 17, at the end of the twentieth century, my mother told me that I was part of the generation that could no longer believe in anything. Good or bad, the greatest ideologies of the twentieth century had collapsed or were in the process of collapsing: Nazism, communism, anarchisms, the religions of the Book… Walls had fallen, but capitalism remained, with an illusion of democracy. Not that it’s good, but no one came up with something better. The time for ideas was over, and politics were meaningless.
Since I was born, we never had a period longer than 3 years without an economic crisis, in my country or anywhere else in the world.
I didn’t know at that time I would experience at least two major revolutions in my life: the digital revolution and the climatic revolution… That I would have to fight just to be able to breathe without poisoning myself. And also to preserve the freedom I was given.
I’m not sure at all, but I feel like it’s the end of a world. It’s time to change logic. And a lucky find will force me to make that change…
At the city dump I found a smartphone that still works, and from time to time, I receive letters from the future…
### Interlude – an illustration
Fukushima, March 11, 2057
Ceremony for celebrating the end of the nuclear power plant decommissioning
This look like it’s easy, but actually it was very long for me (for all the 6 episodes), considering also the time needed for proofreading and translating in English: I wrote in french, my native language.
For this step I use a simple text editor, Gedit, and the markdown syntax for some simple formatting: no distractions. You can prefer more advanced and dedicated tools like Trebly.
Cutting
The next step is cutting my script into pages and panels in a mind mapping software, I choose XMind (Free version).
At this step, I’m already thinking about the final book or ebook : Is this sentence need a full illustration on a two page spread ? How to balance it ? What can I imagine to draw at this moment ? Can I make a full paragraph of the scenario fit in one page ? And so on…

(Sorry, it’s in french, I’m making it in french ;p)
I also know that it will be a digital or physical object: my paper format is an A5, so it’s readable both on paper and on a tablet (almost the same size, no need to resize the text or change the layout). That mean my number of pages must be a multiple of 4 to be printed with a central fold.
So I’m thinking both at my story and my layout, preparing an object with a cover and adding technical things that I must add like the ISBN number. If needed, I can choose to add blank pages so the story start on a single right page, and I did that (pages 4 an 10).
Storyboard
The next step is storyboarding: I prepare the drawing with sketches to give life to my text, but not spending hours in fixing details yet. Storyboarding help to fix ideas, but also to change them before it’s too late.
1/ Get a character
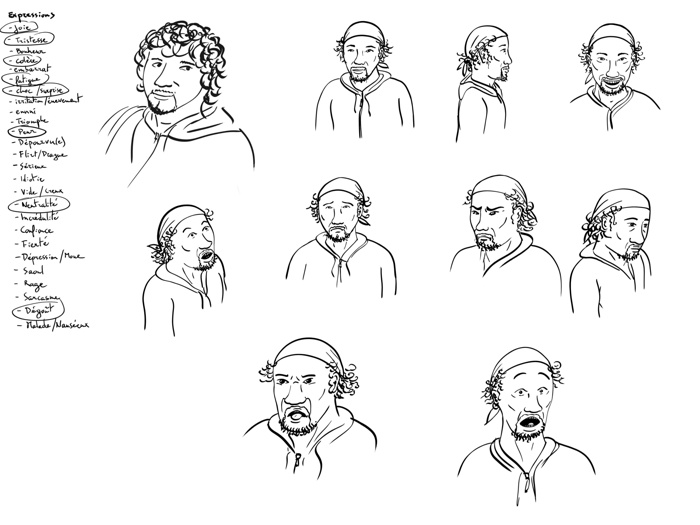
I need a drawing of a character first. I can do that before cutting, but I need to do it before the storyboard to have a good idea of what my character look like. So after some scribbling to fix my ideas, I do two things:
an expression sheet:
and a model sheet:
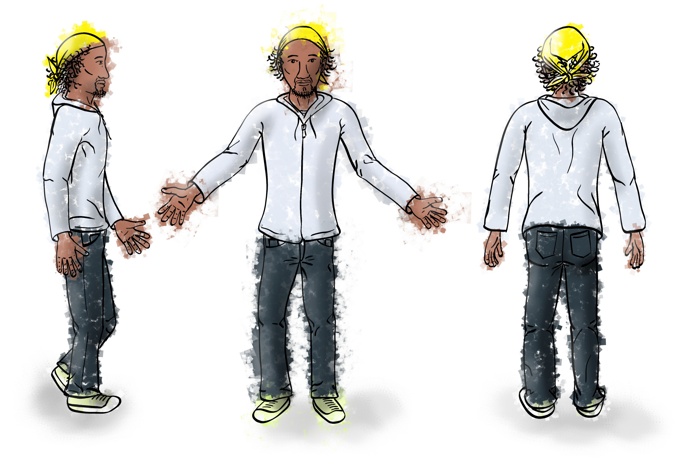
Both help me to define my character and to draw it consistently.
You can also write a character sheet to give him a name, a story, a family, a personality and so on: maybe it will help you to create a unique behavior for your character. I didn’t do that (except for choosing a first name – Hugo -) because I didn’t want to loose myself into details and because that’s not so important in this comic.
2/ Draw panel per panel
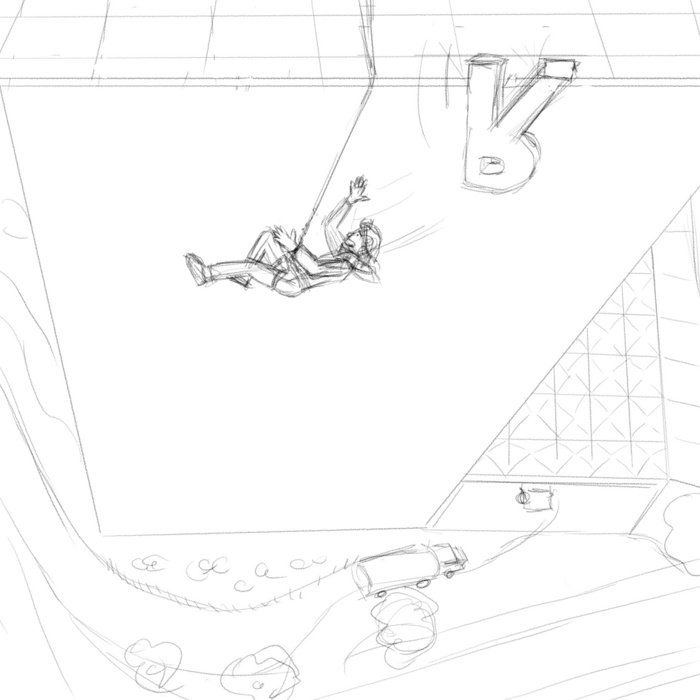
By keeping a look at the cutting and the model sheets, I start to draw sketches of my story, panel per panel. One drawing by panel in a square canvas (2048×2048 pixels) in Krita, based on the cutting, not worrying about the layout yet.
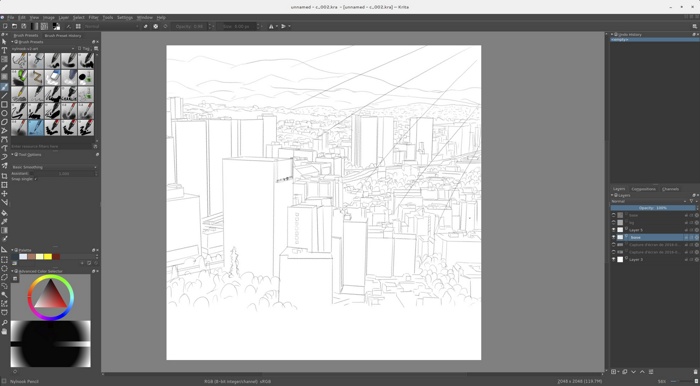
It’s time for me to focus on what I want to represent. The parallel mute story on the R letter falling is born like that by focusing on what to draw.
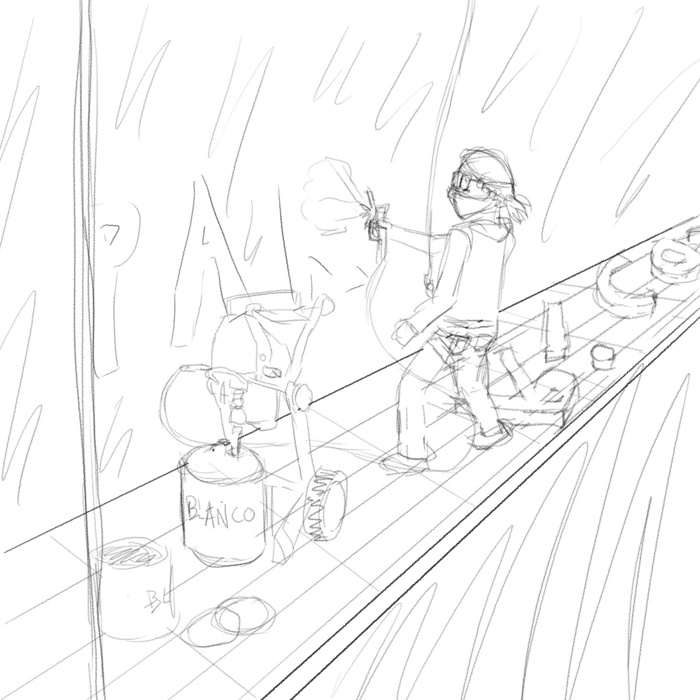
I try not to draw a copy of what I wrote, to give more depth to the story.

It’s also at this time that I’m looking for references of what I am drawing (what a painting machine look like, views of Mexico, a city dump…).

If I get a better idea while drawing, I correct my cutting file.
3/ Storyboard Layout
When all the panel sketches are ready, I start a first layout, based again on the cutting file, and try to make my panels fit into pages in a readable way (rom top left to bottom right in a Z shape). I also add speech bubbles and text from the scenario with my font, plus text for “sounds”.
Most of the time I need to change scales, stretch, crop. Sometimes I figure out that panels are missing, or that some can be deleted.
So I’m back to drawing more panels, and I redo some. I print my first layout on my home printer and read it as a comic and see if it work. And correct again, until I’m happy with it 😉
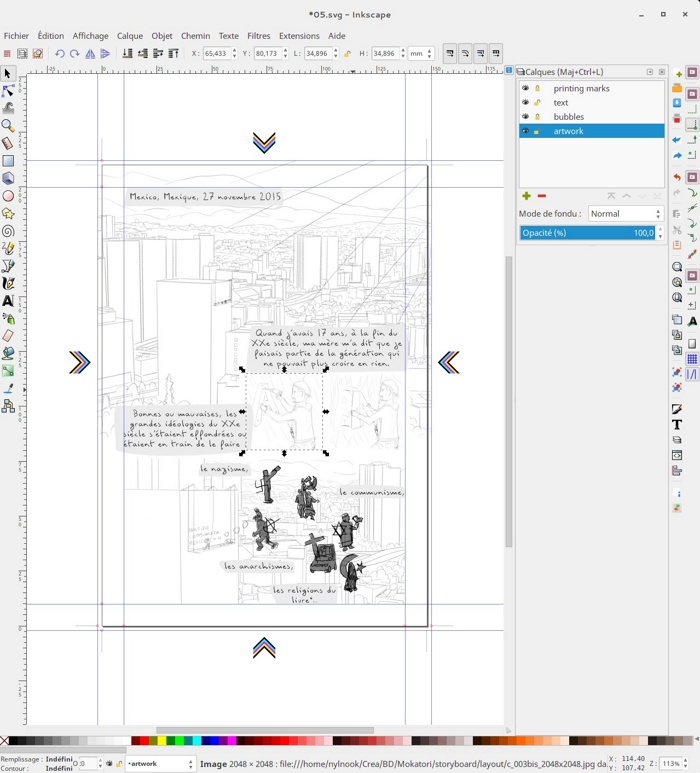
Technically I do that with Inkscape: I created templates files in Inkscape and Krita for my A5 comics, and you can get them here. Th Krita file is prepared at 600 dpi to be able to print it in high quality or to be able to enlarge.
When each page (one page = one Inkscape .svg file) including the cover have a finished layout, I export them with my export script (described later below) to PDF format to be able to print it easily and to share it with other proofreaders.
./export-comic.sh --print storyboard/layout/storyboard-ep0/
If I need to add a blank page, I just add an empty .svg template file with the correct page number.
Doing a first layout at the storyboard step allow me to do a lot of corrections quickly, to choose when I have several options, and most importantly I can avoid big mistakes without wasting too much time.
Drawing, Inking, Coloring
Now I consider the storyboard ready, it’s time for the final drawing, page per page.
Folder setup
Things can start to go wild with a lot of files everywhere if you don’t set up your folders in a comprehensive way.
I set up my files as in the example below. SVG files are source files for Inkscape, KRA files are source files from Krita, and you know the PNG and JPG images 😉
mokatori/
├── cover
├── documentation
├── layout (final layout)
│   └── ep0 ebook-en (one folder by media and language couple)
│   │   └── export folders…
│   │   01.svg (inkscape layout files)
│   │   02.svg
│   │   03.svg
│   │   …
│   │   metadata.sh (metadata variable file for export)
│   └── ep0 ebook-fr (one folder by media and language couple)
│   │   └── export folders…
│   │   01.svg (inkscape layout files)
│   │   02.svg
│   │   03.svg
│   │   …
│   │   metadata.sh (metadata variable file for export)
│   └── ep0 print-en
│   │   └── export folders…
│   │   01.svg (inkscape layout files)
│   │   02.svg
│   │   03.svg
│   │   …
│   │   metadata.sh
│   └── ep0 print-fr
│   └── ep1 ebook-en
│   └── ep1 ebook-fr … (one folder by media and language couple)
│   cover-ep0.png (exported artworks from krita files, this one is a double page spread)
|   p03.png (exported page artworks from krita files)
|   p05.png
|   p06.png
|   …
├── model-sheet
├── pub
├── scenario
└── storyboard
    └── layout (storyboard layout)
        └── storyboard-ep0
            └── export folders…
            01.svg (inkscape layout files)
            02.svg
            03.svg
            …
            metadata.sh (metadata variable file for export)
        └── storyboard-ep1
        └── …
        c_001.jpg (exported panel artworks from krita files)
        c_002.jpg
        c_003.jpg
        …
    └── ref (reference images)
    c_001.kra (panel artworks in krita files)
    c_002.kra
    c_003.kra
    …
export-comic.sh (my export script)
p05.kra (final page artworks in krita files)
p06.kra
p07.kra
…
Prepare final drawing pages with storyboard as a base
The first thing to do is to export the storyboard pages, but without any text, to images files which will serve as a base for the final artworks.
Good news, Inkscape allow to export to .png one layer only from command line in the desired resolution, so I was able to automate the process in a Bash script!
./export-comic.sh --artwork storyboard/layout/storyboard-ep0/
The –artwork option allow to export only the artwork layer (the bottom layer in my Inkscape templates) to a bunch of png files. The files will be in the storyboard/layout/storyboard-ep0/artwork folder.
I will explain how to use this script in the “Exporting” section below.
Start drawing
Now I start drawing in Krita, creating a new .kra file from my comic A5 template and importing the storyboard:

Inking
I usually start by inking the drawings, in black with my inking brushes:

Coloring and texturing
Then it’s time for colors and textures, again with my brushes and textures (to be published) until the final artwork is ready:
And I continue until I’m able to finish all the pages artworks.
Final layout
When I reach the final layout step, almost everything is ready, and I’m usually pretty excited to see my comic assembled.
I export my .kra file to .png and I start by copying the .svg files from the storyboard layout in the layout directory (see the folder structure before).
Then I update the artworks in Inkscape, and do the final positioning for texts (with my font again):
It’s usually quick, but there are maybe some final corrections left in the drawing, so some polishing is left again.
And if you watch well the folder setup, you get it: even if I decided to use an A5 format which can work both for books and ebooks read with a tablet, I need to do one layout per media. They share a lot of things, but the cover change (there is a price on the book, and not on the ebook, another ISBN…), I may remove the blank pages for the ebook, and so on.
Additionally, I’m translating from French to English: finally I do a layout for each media+language couple (ebook in french, ebook in english, book in french, book in english…). But they all share the same artworks files, so copying the .svg files to a new directory to create a new layout and update the text is easy.
Exporting
Here I am, ready to share my comic to the world, it’s time to produce the final files that people will be able to see and use!
It’s something that need to be done for each version (media+language couple), and done again if a last correction occur. It absolutely need it to be automated if I don’t want to become crazy spending my time clicking the same buttons again and again.
Now I’m writing this tutorial, it’s easy: I use the script I created to export to every format I need. But it takes me a while to figure out how to do it and to code it (I’m not a programmer!). It’s “my precious”, but I’m sharing with you 😉
Let’s see what it can do into details. You can download it here, then make sur it’s executable (chmod +x export-comic.sh), and place it at the root of your comic folder so it’s easy to start command line.
To use all functions of the script, you will need to install Bash 4, Exiftools, Inkscape, ImageMagick, Gostscript, Sed, Calibre, Zip and Unzip.
For my Arch based Linux distribution (Antergos), the command to install everything is this one:
pacman -S bash perl-image-exiftool inkscape imagemagick ghostscript sed calibre zip unzip
On a Debian based distrib like Ubuntu:
apt-get install bash ruby-mini-exiftool inkscape imagemagick ghostscript sed calibre zip unzip
So let’s start it, it ask for options flags:
$ cd Mokatori/
$ ./export-comic.sh
Please pass a --all, --images, --web-images, --hd-images, --ebook-images, --print-images, --print, --ebook, --artwork flag and a directory or a path to a filename.svg to this script.
Shortcodes -a, -i, -webi, -hdi, -ebi, -printi, -p, -e, -art
Examples :
./export-comic.sh ebook-en/source-file.svg
./export-comic.sh --all ebook-en/
Before going further, I create a metadata.sh file at the root of each version (media+language couple) layout folder. This allow to give title, author, and so on to my comic files. Here is an example for Mokatori Episode 0 ebook in English:
#!/bin/sh

# Metadata
creator='Nylnook'
url="www.nylnook.com"
year=`date +'%Y'`
copyright="Copyright (c) $creator $year"
licence="This image is licensed under a Creative Commons Attribution-ShareAlike 4.0 International License."
pubDate=`date +%Y-%m`
language=en
title="Mokatori - Ep. 0 - The End"
series="Mokatori"
seriesindex="0"
tags="comics, graphic novel, climate, climate change, creative commons, libre, free"
description="And if the inhabitants of tomorrow sent us letters?
From 2054 to 2084, from Iceland to Afghanistan, from cataclysms to utopias, five stories draw our possible futures during the \"Mokatori\", the word for climate change among Amazonian Indians
Ep. 0 - \"The End\" - Mexico City, Mexico, November 27, 2015"
ebookIsbn="979-10-95663-04-1"

# Generated directories
dirwebjpg=web-jpg
dirHDjpg=hd-jpg
dirverticalstrip=vertical
direbooks=ebooks
dirHDebooks=ebooks-hd
dirprintrgb=print-rgb
dirprintcmyk=print-cmyk
dirartwork=artwork
If you forget to create a metadata.sh file, the script will use test metadatas as placeholders, but it’s really recommended to have correct metadatas in your files.
And again, you should have an ISBN per version. In France, as a self-publishing author, I asked my numbers to AFNIL and I waited two weeks to have 20 numbers. Where to get yours depends on your country, but they are international. Everything else is up to you, but get informed on publishing laws in your country, specially if you want to be able to sell your comic.
Maybe we can start by exporting everything so you can see it all. This command will export my episode 0 ebook into every format I may use, including print (which I don’t need for an ebook, but let’s do it for the example):
./export-comic.sh --all layout/ep0\ ebook-en/
So we had that:
ep0 ebook-en/
01.svg
02.svg
03.svg
…
metadata.sh
Waiting 6 minutes and 44 seconds on my computer, here what the export produced:
ep0 ebook-en/
├── ebooks
|   Mokatori - Ep. 0 - The End - ebook.cbz
|   Mokatori - Ep. 0 - The End - ebook.epub
|   Mokatori - Ep. 0 - The End - ebook.pdf
|   Mokatori - Ep. 0 - The End - HD ebook.cbz
|   Mokatori - Ep. 0 - The End - HD ebook.epub
|   Mokatori - Ep. 0 - The End - HD ebook.pdf
|   Mokatori - Ep. 0 - The End - separate cover.jpg
├── hd-jpg
|   page-HD-01.jpg
|   page-HD-02.jpg
|   page-HD-03.jpg
|   …
├── print-cmyk
│   Mokatori - Ep. 0 - The End - print cmyk.pdf
│   print-page-marks-01.jpg
│   print-page-marks-02.jpg
│   print-page-marks-03.jpg
|   …
├── print-rgb
│   Mokatori - Ep. 0 - The End - print.pdf
│   print-page-01.jpg
│   print-page-02.jpg
│   print-page-03.jpg
|   …
├── vertical
|   Mokatori - Ep. 0 - The End.jpg
└── web-jpg
    page-01.jpg
    page-02.jpg
    page-03.jpg
    …
01.svg
02.svg
03.svg
…
metadata.sh
There are two jpg folders: here I can find my final pictures page per page. I use the simple resolution to publish on my website with the Pulp open source viewer. HD pictures are needed for HD ebooks and can be occasionally useful individually.
The ebook folder contain 6 variants of ebook files: HD or not, in CBZ, PDF and EPUB format. Depending on the online bookseller and the devices, you may need one or the other. CBZ is not used much today, but I use this format to generate others, and the EPUB is by far the more technical to produce (I did so many tests!).
HD ebooks are compliant with latest Amazon devices (Full HD).
There is also a separate cover image, which is often asked in the best resolution when publishing, but must be below 4 millions pixels for Apple (yes, requirements are crazy).
The print folders are separated in two folders too: an RGB version without bleed for printing on your home printer or with a copier, and a CMYK version with bleeds and printing marks for your professional printer.
Finally, there is a “vertical” folder, to publish online on websites that doesn’t allow pages, like DeviantArt, where all the pages are placed end to end in one big image.
And every file have correct metadatas, so I can spread them everywhere with proper credit.
But obviously, I don’t need to generate print files for an ebook, or ebook files for a printing!
So usually I use one of thoses commands:
./export-comic.sh --ebook-images layout/ep0\ ebook-en/
to (re)generate images for ebooks, and then
./export-comic.sh --ebook layout/ep0\ ebook-en/
to create the CBZ, PDF and EPUB files. This allow me to update ebooks without regenerating all the pictures if needed (for a text corrction).
For a print version, it is:
./export-comic.sh --print-images layout/ep0\ print-en/
and then:
./export-comic.sh --print layout/ep0\ print-en/
This script is the result of weeks of work, but it can certainly be improved and made more generic (other formats), so don’t hesitate to contribute here.
Printing and Publishing
Now I have my files ready to publish for ebooks, and ready to print for books… Talking about publishing would deserve a lot more explanations, but you should not underestimate it: I you don’t publish, no one will read your comic, and that would be quite frustrating 😉
Books
Most people read books, not ebooks, so you should print, because here are most of the readers. But that’s a budget, so don’t print what you can’t sell!
I didn’t print much of my comics yet, just 150 copies on my Climate Frogs in french to distribute around me, but for Mokatori I plan to use on demand printing, with the Bookelis service. Print On demand don’t ask you to pay for printing in advance, there is no stock and no waste, and no limited quantity. It seems the best solution for printing books in the twentieth century to me.
You may also print a limited quantity after a successful crowdfunding campaign, that’s an alternative 😉
Web and ebooks
I publish my comics on my website with the Pulp open source viewer, and as far as I can tell, most of my readers choose this way to read them. But I also offer the ebooks at a Pay What You Want price, to offer the choice to download to my readers, with an invitation to finance my work. For that, I use the Gumroad services, which allow to sell at Pay What You Want prices.
For distributing ebooks widely on online booksellers platforms, you can become quite crazy given there are a lot! But happily, Bookelis offer to distribute ebooks from their platform to a lot of online booksellers, so I do that, for free or at a fixed price. Don’t limit yourself to Amazon KDP, the world is mush larger.
On most online booksellers platforms, the format asked is EPUB, and it should be 100% valid with EpubCheck… which is not so easy. By fine tuning the Calibre ebook-convert options in my script, I finally achieved that, so again, use my export script.
You can also use Sigil to craft your ebooks, but as far as I can tell you can’t use it command line so there is no way to automate the export of your ebooks with it.
Finally, to find more readers and some discussions, I publish freely to online communities like DeviantArt, Amilova and Webtoon (but this last one ask yet another layout).
Final word
If you want to explore the files for Mokatori and dig into details, I published my sources on Framagit.
Please leave a comment if you have questions, feedback, or if you want to share your own experience!
